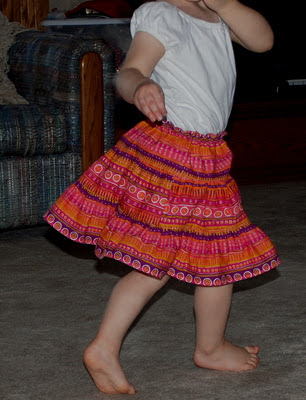
The fabric was so fun, it just called to be made into a tiered skirt.
I determined the length of the tiers rather randomly. "Let's see, why not make them all about four inches."
I forgot that as you attach gathering to another layer, you lose some of the length. Glad I made it longer than I needed.
To determine the width I was much more precise. Waist x 1.5 for the first tier. First tier x 1.5 for the second tier. Second tier x 1.5 for the third tier.
The first step is to sew each tier together into a circle. Right sides together, I always have to remind myself. My fabric was rather fray-ey after I washed it, so I used the serger with this step, and then serged all the sides. LOVE SERGERS!
Then I gathered one side of the third tier. Thanks goes to Dana of MADE for teaching me an easier way to gather. Life is easier now!
Then I sewed the third tier to the second tier. It's important while sewing a gathered fabric to a straight fabric to hold it carefully as it goes through the pressure foot, so that the gathered part doesn't pucker and fold under the seam. That's why I sewed the seam first before serging it.
Then I serged that seam. (Did I mention this was pretty fray-ey fabric for being cotton?)
Then it was time to gather the second tier and attach it to the first tier.
Last of all, I turned under enough fabric at the top of the first tier to make an elastic casing.
I sewed a line the width of the pressure foot from the edge first, to make the top a cute little gather-look as well. Then I sewed a second line with enough room for my elastic to fit in between the two. The second line I didn't finish--I left a gap wide enough to thread my elastic through. How many times have I forgotten to leave the gap to thread the elastic? Well, let's just say plenty. If you forget, there's always the unpicker. (Sadly, he's a good friend.)
I cut elastic the same length as Kewpie Doll's waist measurement and attached a safety pin to one end. Then I threaded it through the casing, making sure that the other end doesn't slide through as well. (You could pin the other end down, but I hate having pins around when I'm touching fabric. I always prick myself. Sleeping Beauty makes it sound romantic to prick your finger. It's not.) A narrow zig-zag stitch will attach the two ends together, and then you can finish that second seam around the elastic.
All that's left now is to twirl.


No comments:
Post a Comment