Showing posts with label Pants. Show all posts

Monday, June 4, 2012

Lounge Pants using existing pants as a pattern

My sister in law wanted some comfy lounge pants.  I liked the idea of the challenge of making pants for an adult.  So I gave it a shot.


She gave me some of her favorite shorts to use as a pattern.  Now these shorts were pretty tight, but that's how she wanted the pants--tight around the hips and then fuller and lounge-y.


So I took the shorts and lined them up with the crotch in the front and traced the front.


Then I did the same for the back.  When I traced them onto my fabric, I used the line of the crotch on one side and measured it wide enough to fit around her hips and waist on the other side.  

That gave me four pieces--two front and two back.  I sewed the front to the back pieces along the long straight side.  Then I sewed the two front pieces together at the crotch and the two back pieces at the crotch.


Last of all, I put the bottom edges of one pant leg together in a tube and sewed it together.  When I got to the crotch I continued on sewing the next pant leg into a tube.

It ended up with the front being smaller than the back. (Which is how we are anatomically.)


Last of all, I sewed a fold over waist band on, and hemmed the bottoms.  I'm not sure I like how it hangs in the front.  I might need to think that one over some more. My first impulse is to say that it's too long in the front and too short in the back, but kids these days love low riders, so I don't know how it should hang.

But the back fits her nicely.  And she loves how comfy they are.


Monday, May 14, 2012

Cut-offs

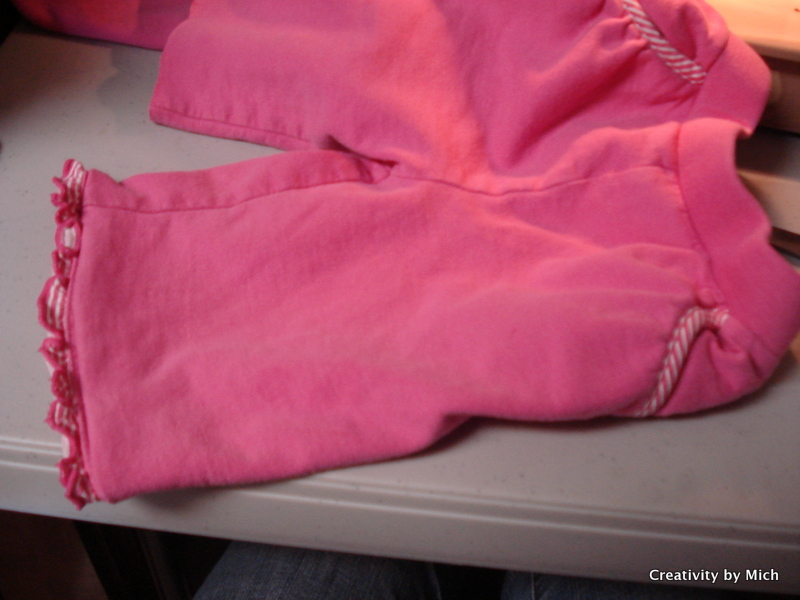
Kewpie tore a hole in the knees of some cute pink pants, and I felt so bad about it.  Then I thought of a fun way to save them:  cut them off.


I also cut off the cute hems on the pants.


Then I sewed the original hem to my new hem.


And walah.  Still cute, but now they're shorts.


Sunday, April 22, 2012

Pants Crazy!

I've been going crazy about making pants!  It was partly motivated by the fact that my Kewpie Doll is sprouting and her pants are shrinking, so she needed some more pants. Part of my motivation is how easy and quick it is to make pants.  Let me show you!  


I traced a pair of Kewpie's pants that fit her well.


And made a pants pattern that I have been using on EVERYTHING!

Notice that I cut two of the same pattern, with the straight line on the fold.  My pattern wasn't as long as Kewpie needs, so I measured her best fitting pants from the crotch to the ankle and used that number to determine the end of her pants.

Remember my summer-time pajamas?  Made from the pattern above.

I really love taking a wide elastic, stretching it across the fabric, and sewing directly to the waist instead of making a casing.  So much easier!  It's helpful to pin the waist in quadrants and the elastic in quadrants and attaching them together that way, so you know you're sewing the elastic on semi-equally all the way around.

I also made some sweats out of scraps of an old t-shirt.  Made from the same pattern.

I used the hem of the old shirt at the waist, cut notches for the drawstring to go through, and I already had my drawstring casing. Super fast, super easy, and Kewpie is delighted to have work out sweats just like mine!


I cut off the sleeves of an old cardigan, spread them out on my pattern and cut them to make ribbed leggings.


  I sewed an elastic at the top, and they were ready to wear!


It feels like these leggings were too wide, and therefore got a little baggy.  I might go back and sew it more narrow.

But then, it was an old cardigan, and perhaps there's not much stretch left in it.


I made the pattern a little wider to make these cotton elastic waist pants.


I'm learning that the same front and back works fine for tight-fitting pants, like leggings, but is less comfortable in looser pants, like these.

The problem is that we just aren't the same in the front as we are in the back!


Last of all, I took one of my old layering t-shirts and cut it up to make leggings to go under dresses.


I used the hem of the t-shirt so that I wouldn't have to hem the leggings 


(I'm so scared of hemming knits.  I can't help but stretch them.)


I sewed an elastic directly to the top of the leggings.
That's the end for now.


I'll be back with more!

Monday, March 26, 2012

Adult Night Gown to Child's Pajamas


All of the sudden, it's not cold at night anymore.  


Which means that Kewpie's warm PJ's are too warm to sleep in.  


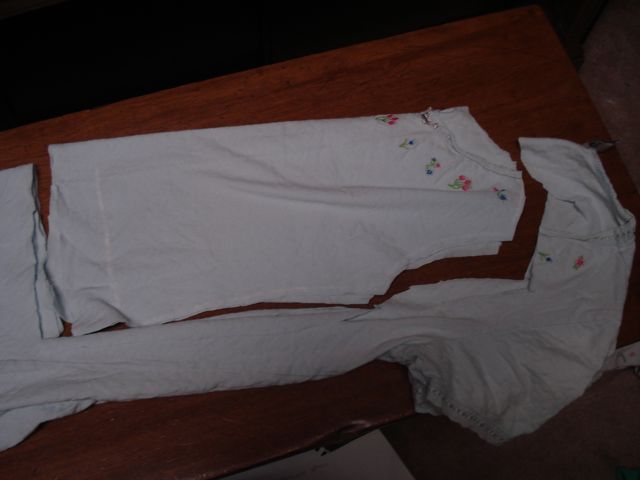
So I went looking in my discarded clothes box and found this old nightgown from my mom. Thanks Mom!


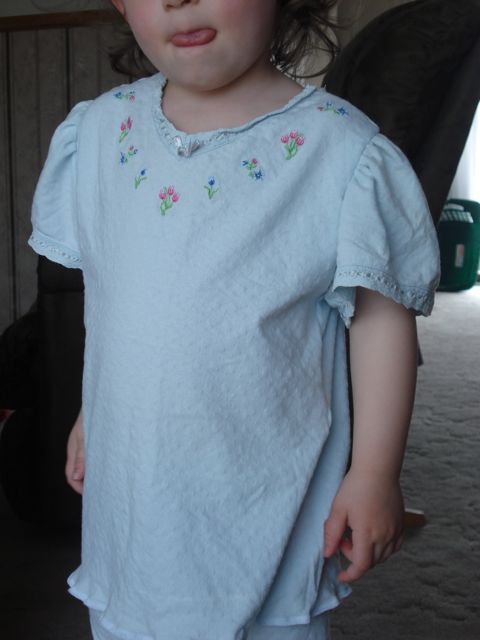
I really wanted to keep the embroidery around the neckline, and I loved the lightweight, stretchy blue knit.  

I'd traced a t-shirt of Kewpie's before, following this tutorial from indietutes.  

Then I lay it out on the nightgown, making sure that the neckline included the embroidered flowers.


After cutting it out, it was pretty simple.  Sew the shoulders closed, and sew up the sides.

For the sleeves, I wanted to the follow the same idea as the green t shirt I made for Kewpie earlier. (Click here to see it.)  So I used the original sleeves without making them smaller to fit the smaller frame.


This time, I measured 3 inches up from the armpit and gathered the sleeve until it fit inside the frame of the shirt.  Then I pinned it in place and sewed it in.


I'm going to have to rework my pattern, because the shoulders were too big when I tried it on Kewpie.


Perhaps I had made it big enough for a seam allowance, and then I serged it and didn't take enough off. Who knows.


The leggings were super simple.  I traced some knit pants of Kewpie's following Dana of MADE's idea.  I didn't worry about backs or fronts, though, because they were going to fit rather tightly. 


Pants are so easy to make!  


Once they're cut out, just sew the front and back together and sew one long seam from ankle to crotch to ankle.  


Sew in an elastic waist.


I think the whole project took me about an hour!  (We'll see how long it takes to get that top to fit right, though.)


Addendum:  Well, it's gotten even hotter, and I wasn't surprised to see the top worn alone one morning.  So I took some scraps and cut out a four inch ruffle for the top, and now it's a nightgown again.  Perhaps the fabric missed being a nightgown. 

Lesson:  don't throw away scraps. (My mother is probably disagreeing with me at this moment and about to explain to me that this is the way you become a pack rat.  Too late, Mom.)

Sunday, December 4, 2011

Scrappy Pants


My mom has lots of fabric scraps.  She's the kind that hates to throw things out.  So she saves little scraps from things she's made.

I came upon scraps of this great green cordoroy that I just wanted to use.  But none of the scraps were big enough to use.  Not even for my little baby.


But I didn't let that get me down.  I pieced them together.  Then I used a pattern to cut them out.  Once you've cut them out, pants are so easy. Three seams and they're together:  two to sew the sides together and then one long seam around the inseam.

I used a wider elastic for the waist because wider elastics are easier on tummies. (Pregnancy taught me this.)


I simply serged the hem.  Next time I'll give it a real hem because I could have used the extra fabric when she grows.  They seem to grow longer before they grow wider.


I really like how the seams turned out.  It's kinda fun.