Monday, March 26, 2012

Adult Night Gown to Child's Pajamas


All of the sudden, it's not cold at night anymore.  


Which means that Kewpie's warm PJ's are too warm to sleep in.  


So I went looking in my discarded clothes box and found this old nightgown from my mom. Thanks Mom!


I really wanted to keep the embroidery around the neckline, and I loved the lightweight, stretchy blue knit.  

I'd traced a t-shirt of Kewpie's before, following this tutorial from indietutes.  

Then I lay it out on the nightgown, making sure that the neckline included the embroidered flowers.

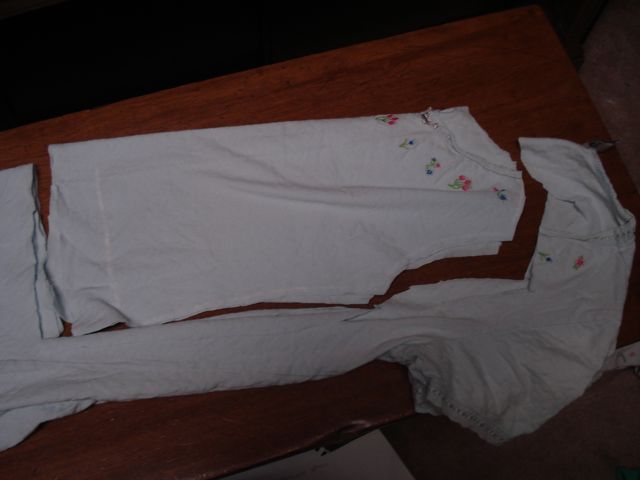


After cutting it out, it was pretty simple.  Sew the shoulders closed, and sew up the sides.

For the sleeves, I wanted to the follow the same idea as the green t shirt I made for Kewpie earlier. (Click here to see it.)  So I used the original sleeves without making them smaller to fit the smaller frame.
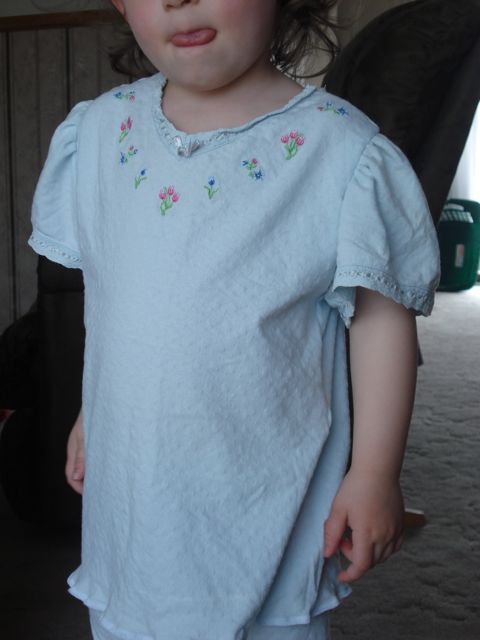


This time, I measured 3 inches up from the armpit and gathered the sleeve until it fit inside the frame of the shirt.  Then I pinned it in place and sewed it in.


I'm going to have to rework my pattern, because the shoulders were too big when I tried it on Kewpie.


Perhaps I had made it big enough for a seam allowance, and then I serged it and didn't take enough off. Who knows.


The leggings were super simple.  I traced some knit pants of Kewpie's following Dana of MADE's idea.  I didn't worry about backs or fronts, though, because they were going to fit rather tightly. 


Pants are so easy to make!  


Once they're cut out, just sew the front and back together and sew one long seam from ankle to crotch to ankle.  


Sew in an elastic waist.


I think the whole project took me about an hour!  (We'll see how long it takes to get that top to fit right, though.)


Addendum:  Well, it's gotten even hotter, and I wasn't surprised to see the top worn alone one morning.  So I took some scraps and cut out a four inch ruffle for the top, and now it's a nightgown again.  Perhaps the fabric missed being a nightgown. 

Lesson:  don't throw away scraps. (My mother is probably disagreeing with me at this moment and about to explain to me that this is the way you become a pack rat.  Too late, Mom.)

Tuesday, March 6, 2012

T-shirt Fancifying for the Two Year Old

Excuse the sad face.  Kewpie likes the shirt, just not the photographer.  She's two.

I had this plain small children's t-shirt in green that I got from the dollar store.  Kewpie is smaller than a children's small, though.  I'd put the t-shirt in my stash, waiting for inspiration, and when I saw it this week, I was inspired.  It is, after all, March.  The month to celebrate green.

First of all, I cut the t-shirt off completely an inch under the arms.

Then I took a t-shirt that fit her well, folded it in half, poked the sleeves in, and traced the body.


You could also trace a sleeve, but I discovered that I didn't need them..


Then I placed the pattern on the top of the t-shirt, lining it up with the top seams and neckline (I was still going to use those) and traced it with soap.  Then I cut around the arms and down.  (Sorry, forgot to photo that.)

I cut about an inch off the sleeve at the part where it meets the shirt to make it shorter.  Then I pinned and sewed the sleeves back in, but because the body was smaller now, the sleeves were too wide.  That made for a cute little pucker in the top of the sleeve.


Then I took the bottom part of the shirt, gathered it, and reattached it to the now smaller shirt.


Last of all, I tried it on Kewpie, and she gave her approval, whew!


I would say it took me about 30-45 minutes.

Now to ponder on how to embellish it.  A shamrock on the front?


Sunday, February 26, 2012

National [Apple] Pie Day

Last Monday was National Cherry Pie Day.  But after searching the house for cherries, I was easily  convinced that apple pie would work just as well.  I was so excited to try out this pie crust recipe from MADE.  But I had no eggs in the house.  So I looked on the back of the Crisco package and found this recipe:

2 cups flour
1 tsp salt
3/4 cup well-chilled Crisco. (well, mine wasn't WELL chilled.)
4-8 T ice cold water. (I used only 4 T.)

Mix the flour and salt and then cut the Crisco into the mix until it is well mixed.  They said coarse crumbs with pea sized pieces, but really its until the Crisco is well mixed into the mix.  Then I measured out 8 T of water. (Why don't they just say 1/4- 1/2 cup instead of 4-8 tablespoons?)  I poured it in in little bits and massaged the mix until it stuck together.  It ended up being about 4 tablespoons (or 1/4 cup if you're not a crazy recipe maker.)

Dana of MADE says that overhandling pastry is bad, so very gingerly shape into two balls, flatten them to about 2 inches thick and put them in the fridge.  The recipe said for 30 minutes.  I didn't time it, I just put it in until our apples were ready.

We used Betty Crocker's recipe for the apples mix:

  • 3/4 c sugar (wow!  that's too much for us, I used 1/3 cup and it tasted fine.)
  • 1/4 cup flour (this helps it to solidify, so your pie isn't so runny.)
  • 1/2 tsp cinnamon (If you're a cinnamon lover or even liker this is not going to be enough cinnamon for you.  I just poured cinnamon in until it looked good, or as Kewpie said, "It's brown now.")
  • 1/2 tsp nutmeg (I followed this one, and couldn't taste it, so maybe a pinch more would have been good.)
  • Dash of salt (It wasn't enough.  Needed a dash more, I'd say.)
Once that's all mixed together, add the apples.  (about six large ones if you're using fresh or two cans if not.)

Then we grabbed our dough out of the fridge and rolled it out, remembering Dana's warning to not handle it too much.

It should be about two inches larger than your pie tin.  Place the bottom crust in the tin, make sure it fits well and run a knife around the edges to cut them off.

Pour the apples in, and lay the top crust on.

When you cut off the edges on the top piece, give yourself about 1/4 inch overlap.  Fold that under and then you have some dough to make cute little ridges around the pie.


Cutting little bird marks in the pie helps the crust to not puff and bubble weird.  But if you like that puff and bubbling, then don't cut the cute little bird marks.

I also like to sprinkle a little sugar on top.

Some people brush the top with milk or egg to brown it better.  I didn't, and it seemed to brown fine to me.


It helps to cover the edges with tinfoil or one of those fancy-dancy pie crust shields, so the edges don't burn.
Then it goes in the 425 degree oven and you wait.  And wait.  40 to 50 minutes of waiting.


When it's been about 35 minutes, take off the shield or foil so the edges can brown.  When it looks golden and bubbly, then it's DONE!


Waiting worth while.


Monday, February 20, 2012

Simple Fleece Shrug

When I saw this tutorial, from Amber Perry Patterns, I was intrigued by how easy the idea of a simple shrug would be.  I often give my girls a long sleeve undershirt to wear under a short sleeve shirt when it's cold outside, and this looked like another alternative.  So I gave it a try.


Basically you take a rectangle of fleece about the length of your child's arm span and wide enough to go around their arms and sew both sides closed until the arm pits.  Simple and quick.  Well, maybe not so quick for me.
Here's what I learned:

Measuring children is terribly difficult.

The original tutorial says to measure from middle of back to wrist, but I discovered that when Xena bends her arms in, there's more distance from her back middle than when she holds her arms out straight.  The sleeves were a little short for this reason.  Next time, I'll take the longer measurement.


There was also the issue of how close to the armpits to sew the shrug.  The tutorial suggested two inches from the arm pits, but that wasn't long enough for one year old Xena.  I had to sew it, and try it on, and sew it again and try it on until I got the right length.

Next time I'm going to try it with the stretch of the fabric going lengthwise instead of widthwise, to see if that would make it easier to put on.


Both Xena and I love the little head cloth I made with it.  I was going to tie it shut into a hat, but when I tried it on her to see if it fit, I loved the Aunt Jemima look, so I left it the way it was.  It was so cold those next few days, that Xena loved the extra warmth.