Thursday, October 18, 2012

Maxi skirt from a dress

I love a flowy-long skirt.  Always have.  I love that they're back in style.  


I set out with some super cute knit fabric to make me one, and got side-tracked by this dress.


What was wrong with this dress, you ask?  Well the reason it had been sitting in a box for fifteen years was because of an accidental sharpie mark right in front at the waistline.  It was also a little short--it hit my shins right at the point to make them seem bigger.  And I didn't have the slender stomach to wear it anymore.  But I never threw it out because it was such a comfortable dress and I loved it.  

You can see where I cut it off.  I figured the sharpie part wouldn't show past the folded-over waistband.


I was going to cut more off to make a waistband, but then I tried it on and realized that it was already tailored to sit on my hips.  So I just folded it down until it was exactly the length I wanted.  


This is excellent, because some of my shoes are taller than others, and I can lengthen or shorten the skirt accordingly.  Accidental genius.


PS. I'm Baa-ack!

Wednesday, August 8, 2012

Silence predicted

As I pull everything out of closets and try to decide what I should throw out and what I should pack, I have made the resolution to not sew anything until we've moved.  It's been tempting to put aside what I need to do for some project that strikes my fancy, and I already have a few projects I could photograph and post, but I've put my foot down.  The dirty work needs to get done!

We're moving in the middle of September, so I'm hoping to have my sewing back by October.  Hopefully I'll see you then!

Thursday, July 26, 2012

Make it new with shirring

Don't hesitate to notice a trend here. As I grow out of my clothes, I've got maternity shirts on my mind.

Before and after.  (Yes, these are the same shirt, but I didn't take them in the same light, silly me.)


Ode to a Hand-Me-Down Maternity Shirt
Oh, maternity shirt from my sister
I'm only going to wear you for a short time
So I'm glad to not spend any more money
But your boat-like boringness
Makes me feel the same when I wear you.
How can I make this pregnancy more exciting?


Well, let's start with that hem.  I unpicked the t-shirt hem. (Painful, but it gave me three more inches, and it was worth it.)


Then I shirred it with elastic thread seven rows.

If you'd like to know more about shirring, go here.  

No reason for the seven, rows, except that if I line up the last row along my pressure foot, then I get seven rows from the first unpicked seam to the bottom of the shirt.

Then the neckline.  I measured to the center of the neck, and then drew five lines about 4 inches long.  The distance between them was about 1/2 inch.  Then I sewed them with elastic thread.

Last of all, the sleeves:  I did NOT want to unpick any more seams, so I cut them off.   Then I sewed three lines about 8 inches long parallel to the edge of the sleeve., centered on the line down from the top of my shoulder.


I discovered that this line isn't along the shoulder seam, but a little more forward.  It was necessary to try the shirt on and put a pin where I wanted my center to be.

Pretty Fun, Huh?

Tuesday, July 24, 2012

Rouching to make the XL t-shirt maternity.

Most of the time innovations and ideas come because of needs.  I have a new need:  clothes that I can wear with an expanding belly.  Yes, I am expecting.  It might not look like much of a belly now, but I remember those sad days of the third trimester when nothing seemed to fit anymore.  This time, I'm preparing ahead of time.


I might have mentioned the plethora of XL t-shirts we have?  Well, this one was destined to be my experiment in making myself a maternity shirt.  Because of the experimental approach, and my lack of energy to do much but get-er-done, I don't have any photos of the process.  Hopefully, this will be understandable anyway.

1.  I created a t-shirt pattern for myself by tracing half of my favorite-fitting t-shirt without the sleeves.  I've done that several times.  See it here or here.    Then I lay that half-pattern over this large t-shirt and traced it again on both sides.  I only traced to my bustline, and let it out as quickly as I could without making it come to points as I mistakenly did here.

2.  I took the cut-off sleeves and trimmed away the part that had connected to the shirt until the sleeves were as long as I wanted them and wide enough to fit in the now-smaller armhole.  I have left the sleeves wider, and made them ruffle at the shoulder before, and that is cute too.  Check it out here.

3.  Then I sewed the sleeves in and sewed up the open parts of the sides.  

The t-shirt now fits, but it is rather boring and balloon-like.  How can I make it cuter? 

Lets start with the sides.  I tried this before here, and rather liked it.  With my elastic thread in my bobbin, I sewed up both sides to my bustline.  Then I sewed up the crest of the sleeve as well.  This is what happened.


The top fits me well, and there's plenty of room around my waist.  Perfect.

Now for the neck.  I'm going to avoid any sewn-on embellishments at the moment because I'm worried about my grabby toddler, but some cute flowers or yo-yos could be fun at the neckline.

I wanted a smaller ribbing around the neck, so I trimmed it, like I did here.  It makes the neck less stretchy, but it looks less casual as well.

Then I took that elastically-threaded bobbin, and sewed a few inches down from the neck, making it into a V-neck.  


It doesn't look much like the shirt it was before.

I love how roomy it is. (I'm actually wearing it as I type this.)

Friday, July 20, 2012

Skirt from an extra large t-shirt

Warning:  we inherited a box full of very large t-shirts, so you're going to see a lot of ways to use a t-shirt. 


I love using t-shirts as the beginning of sewing with knits because there are already finished hems involved, so I don't have to try that out.

First off, I should send a thanks to Corinnea's Chaos for teaching me how to make a yoga-style waistband. What with my expanding waist, the comfort of this waistband is very appealing.  I'm not going to talk about the waistband.  She does such a better job at it than I would.


1.  I took my extra large t-shirt (it might even have been XXL) and laid it out flat.  Must be sure all the seams are lined up:  shoulders, sleeves, hem, etc.

2.  Then I laid my yard stick across the top as high as it could go, and still cut off the neckline.  Then I drew a line.

3.  Then I drew a similar line to cut off the sleeves. I used the sleeves to make the waistband.

It's important to be very gradual with this line, because if you could create not-so-cute little points where your seam ends unless you gradually blend into the side.


Let me show you what I mean.


See the not-cute point on my hip on one side and by my thigh on the other?


I should also mention that when you draw your lines, make sure that both sides are the same.  

4.  Ok, cut along the lines.

5.  Sew the sides, making sure to be gradual enough that you don't have those not-cute points.

6.  Sew the waistband to the top.  If you are in a really big hurry and don't want the comfort of a yoga waistband, then sew a very wide elastic to the top as shown here:

7.  Wear.  A lot, because it's cool and comfortable.  This is tighter than it might have been because I had to go back and redo my not-cute seams (are you tired of the the phrase not-cute yet?).


Even with the seam issue, it still didn't take more than an hour.  I'll bet next time I could do it in 20-30 minutes.  I think I'll make one in black, and pink, and, what other color t-shirts do I have?  Maybe I should stick a ruffle on it and make it a maxi-skirt.

Thursday, June 28, 2012

Attaching a skirt to a shirt makes a dress

Thank you to A Small Snippet for inspiring me.

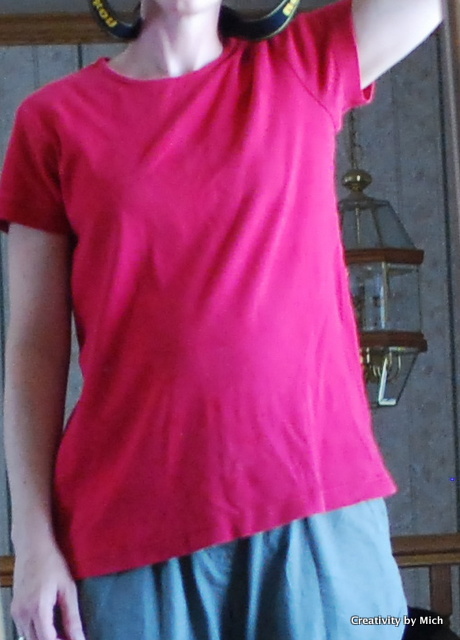
I loved this shirt, but it is too short, and it shows my kangaroo pouch.  Even though I love it, I haven't worn it since I got the kangaroo pouch. (Love the kids, but there were definitely sacrifices made to have them. :))

So I found some fabric that matched it, and made me a dress out of it.  It took about an hour.

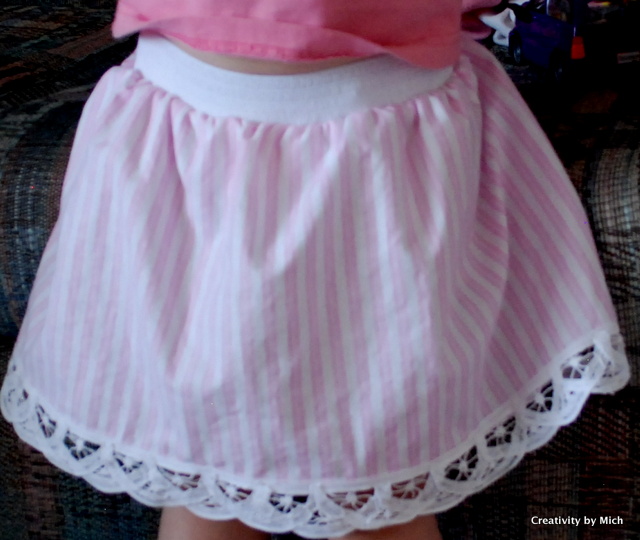
In the original tutorial, she used elastic thread to gather the fabric, and a sash to cover where the shirt attaches to the skirt.  I had just got some fantastic colored elastic and thought perhaps I could try that instead.

In my experience, elastic thread can be so unpredictable in the final width, while if I used an elastic, I could measure out exactly how wide I wanted my skirt to end up.

I described how to attach a skirt to an exposed elastic in the last post.  Takes lots of pinning, but it's worth it.


First things first.
1.  Measure how wide you want the elastic to be.  I planned to have the skirt meet the shirt below my bustline, so I measured that width, plus a half inch for seam allowance and any day I might feel more bloated than I do today.

2.  Divide and pin the skirt and elastic (as shown here).  Then stretch the elastic as you sew them together so that it is as long as the fabric.  Ends up looking like this.

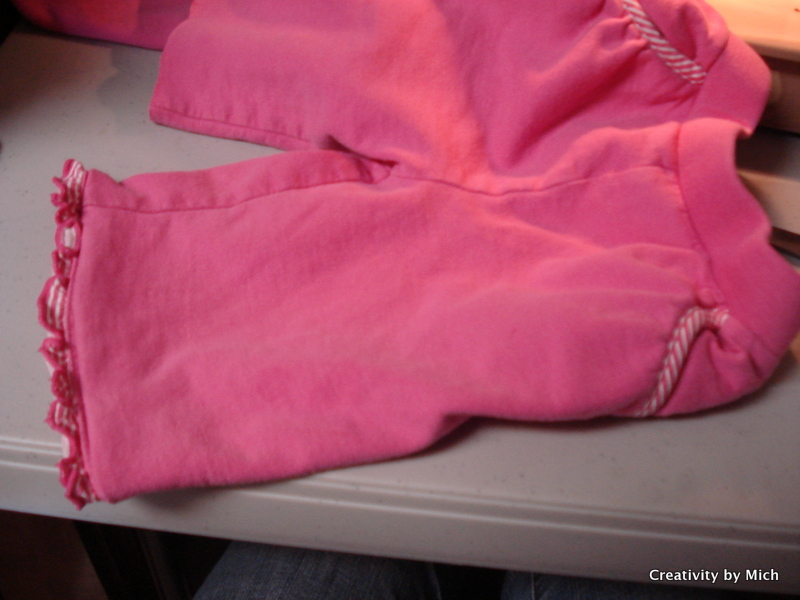
3.  Cut off the shirt where you want it to attach to the skirt (plus a quarter inch for the seam).

4.  Divide and pin the shirt and elastic the same way you did the skirt and elastic.  They should be about the same size, so there won't be as much stretching when you sew them together.

This is where I used a serger, because I wanted this seam to have some stretch.  The knit was stretchy and so is the elastic.  I imagine there's another way to make this a stretchy seam, but I couldn't tell you.  Sorry.

It ends up looking like this.  Perhaps I will iron it, so that the elastic shows more.


The last thing to do was to hem the skirt.  I would have liked to make it a maxi, as my inspiration did, but I didn't quite have enough fabric, so it ends up somewhere below my knees.  Perhaps if I don't like it enough, I'll put a ruffle on it.  But for now, it's lightweight, (which is necessary with the current weather) and full enough to run after any stray toddlers. AND it took an hour.  Faster than shopping.  I'll take it!


Friday, June 22, 2012

Stripes and Lace Skirt

Such sweet pink and white striped fabric called to me to be made into something.  And an occasion gave me an excuse:  the birth of a little girl, the third little girl in this family.  So I made matching skirts for all of them.  


I made it pretty simple.  A straight skirt, about 1 1/2 times the width of the waist.  Then I lined the hem with some beautiful lace my mother-in-law gave me.


The exposed elastic has become my new favorite thing--because of the way it looks, the ease of sewing it in (I hate threading elastic through a casing.) and the comfort of it.


My elastic is about 1/3 inch shorter than the waist measurement, just because I've noticed that elastic stretches once it's sewn on, and my hipless three year old needs things to fit tight or they'll fall down.

Once I'd serged my elastic into a tube, I folded the elastic into fourths and pinned it.  Then I did the same thing with my skirt.  Then I matched the pins and pinned them together.


 Notice that the skirt is wider than the elastic?  When I sewed the two together, I pulled the elastic, and stretched it to the same length as the skirt.  This causes the skirt to gather.


A quick, simple, cute project.  Does that sound familiar?


Thursday, June 14, 2012

Tiered Maxi Dress

I wanted a dress that was cool enough for the summer, but long enough that I don't have to worry about whether I'd shaved my legs that day.  Enter the tiered maxi dress.

This was made from four xtra large men's shirts that I happened to have.

For the top shirt, I placed a t-shirt that fits me well on top of the men's shirt and traced down from the shoulder seam, through the arms eyes and a few inches beyond.

Then I cut it out.  I cut out the sleeves and traced my t shirt sleeves on top, keeping the hem of the existing sleeves.  Then I sewed the sleeves back in and down the side.

Originally, the top part was going to end below the bustline--like an empire waist.  But I sewed it a little too tight, so I cut it off above the bust.

Then I cut up the remaining shirts into as wide a strips and I could get them.  I figured how long I'd need each tier to be by timesing the upper tier by 1.5.


Then it was just a matter of gathering the current tier and sewing it onto the tier above it.  I made certain that I had the hem from the t shirt for my bottom tier so I wouldn't have to hem it.

I love how the dress doesn't touch me below the bustline.  Super Comfy.


This just might come in handy, if I were to gain a little weight around the waist....


Monday, June 11, 2012

Microwaving non-microwave popcorn

Fir0002/Flagstaffotos
I had a friend tell me about this and I was skeptical, but I gave it a shot.

1.  I bought one of those 2 lb bags of normal, not microwave popcorn. (for $1.50!)

2.  I poured a handful of kernels into a very normal paper bag (I actually used one I got from a grocery store.)

3.  I put it in the microwave for about 5 minutes.  Within one minute, the popcorn was popping!

4.  Just like with normal microwave popcorn, when the popcorn started to slow down, I took it out.

Looks like normal popcorn, tastes like normal popcorn.

HAVE I BEEN RIPPED OFF ALL THESE YEARS BUYING "MICROWAVEABLE" POPCORN WHEN YOU CAN MICROWAVE ANY OLD POPCORN?

The sad, but true answer is, YES.

Please pass this on.  Let's expose this lie for what it is! :)

Monday, June 4, 2012

Lounge Pants using existing pants as a pattern

My sister in law wanted some comfy lounge pants.  I liked the idea of the challenge of making pants for an adult.  So I gave it a shot.


She gave me some of her favorite shorts to use as a pattern.  Now these shorts were pretty tight, but that's how she wanted the pants--tight around the hips and then fuller and lounge-y.


So I took the shorts and lined them up with the crotch in the front and traced the front.


Then I did the same for the back.  When I traced them onto my fabric, I used the line of the crotch on one side and measured it wide enough to fit around her hips and waist on the other side.  

That gave me four pieces--two front and two back.  I sewed the front to the back pieces along the long straight side.  Then I sewed the two front pieces together at the crotch and the two back pieces at the crotch.


Last of all, I put the bottom edges of one pant leg together in a tube and sewed it together.  When I got to the crotch I continued on sewing the next pant leg into a tube.

It ended up with the front being smaller than the back. (Which is how we are anatomically.)


Last of all, I sewed a fold over waist band on, and hemmed the bottoms.  I'm not sure I like how it hangs in the front.  I might need to think that one over some more. My first impulse is to say that it's too long in the front and too short in the back, but kids these days love low riders, so I don't know how it should hang.

But the back fits her nicely.  And she loves how comfy they are.


Sunday, May 27, 2012

Pillowcase Dress

We have a sweet cousin who has eyes this blue and it's going to be her birthday soon!


I knew I wanted to make her a dress, so when I saw Simple Simon's Pillowcase Dress I had to give it a try.  It only touches her body at one point, which makes it so very cool for the hot climate she lives in.


And so simple!  Make a tube about 1 1/2 the width of the chest, make a elastic casing, add a ruffle and straps.


It made Kewpie want to twirl.  But pretty much anything with ruffles makes Kewpie want to twirl.  We hope our cousin loves it too!

Wednesday, May 23, 2012

Blue Knit shirt to dress

I don't have any during pictures for this.


So I'll just have to explain.  I took a soft knit shirt, cut it off at the neckline and cut off the sleeves.  I sewed up the holes left from the sleeves and there I had a tube for the main part of the dress.


I took the leftover fabric and sewed it into a tube that was about an inch less wide than my dress-tube.  Then I sewed it to the top of the dress tube, stretching it to fit as I sewed.


Last of all, I took the ribbing from the neck of the shirt and cut it up to make straps.  Beautiful color, soft and comfy.  Perfect for the coming warm season.  (Or a cold day, as this day was.)

Monday, May 21, 2012

Brocade Skirt

I absolutely love this fabric.


I chose it for my bridesmaids' skirts.

I still have mine.  (Don't tell me, bridesmaids, if you threw yours out.  I don't want to know.)

I discovered recently the runners my mom had made for the tables at my reception, and decided that I would make a matching skirt for Kewpie.

The runners were about this wide, so I serged them together and then gathered them and sewed them to a waistband that included an elastic casing.

Pretty simple, but with such intricate fabric, anything fancier would be too much.

My mom made a sweet toddler dress that fits Xena and now my two girls and I are matchy-matchy.

Saturday, May 19, 2012

Busy with....

I've been busy lately.  This is what I've finished.


Much more to come!


Monday, May 14, 2012

Cut-offs

Kewpie tore a hole in the knees of some cute pink pants, and I felt so bad about it.  Then I thought of a fun way to save them:  cut them off.


I also cut off the cute hems on the pants.


Then I sewed the original hem to my new hem.


And walah.  Still cute, but now they're shorts.