Thursday, October 18, 2012

Maxi skirt from a dress

I love a flowy-long skirt.  Always have.  I love that they're back in style.  


I set out with some super cute knit fabric to make me one, and got side-tracked by this dress.


What was wrong with this dress, you ask?  Well the reason it had been sitting in a box for fifteen years was because of an accidental sharpie mark right in front at the waistline.  It was also a little short--it hit my shins right at the point to make them seem bigger.  And I didn't have the slender stomach to wear it anymore.  But I never threw it out because it was such a comfortable dress and I loved it.  

You can see where I cut it off.  I figured the sharpie part wouldn't show past the folded-over waistband.


I was going to cut more off to make a waistband, but then I tried it on and realized that it was already tailored to sit on my hips.  So I just folded it down until it was exactly the length I wanted.  


This is excellent, because some of my shoes are taller than others, and I can lengthen or shorten the skirt accordingly.  Accidental genius.


PS. I'm Baa-ack!

Wednesday, August 8, 2012

Silence predicted

As I pull everything out of closets and try to decide what I should throw out and what I should pack, I have made the resolution to not sew anything until we've moved.  It's been tempting to put aside what I need to do for some project that strikes my fancy, and I already have a few projects I could photograph and post, but I've put my foot down.  The dirty work needs to get done!

We're moving in the middle of September, so I'm hoping to have my sewing back by October.  Hopefully I'll see you then!

Thursday, July 26, 2012

Make it new with shirring

Don't hesitate to notice a trend here. As I grow out of my clothes, I've got maternity shirts on my mind.

Before and after.  (Yes, these are the same shirt, but I didn't take them in the same light, silly me.)


Ode to a Hand-Me-Down Maternity Shirt
Oh, maternity shirt from my sister
I'm only going to wear you for a short time
So I'm glad to not spend any more money
But your boat-like boringness
Makes me feel the same when I wear you.
How can I make this pregnancy more exciting?


Well, let's start with that hem.  I unpicked the t-shirt hem. (Painful, but it gave me three more inches, and it was worth it.)


Then I shirred it with elastic thread seven rows.

If you'd like to know more about shirring, go here.  

No reason for the seven, rows, except that if I line up the last row along my pressure foot, then I get seven rows from the first unpicked seam to the bottom of the shirt.

Then the neckline.  I measured to the center of the neck, and then drew five lines about 4 inches long.  The distance between them was about 1/2 inch.  Then I sewed them with elastic thread.

Last of all, the sleeves:  I did NOT want to unpick any more seams, so I cut them off.   Then I sewed three lines about 8 inches long parallel to the edge of the sleeve., centered on the line down from the top of my shoulder.


I discovered that this line isn't along the shoulder seam, but a little more forward.  It was necessary to try the shirt on and put a pin where I wanted my center to be.

Pretty Fun, Huh?

Tuesday, July 24, 2012

Rouching to make the XL t-shirt maternity.

Most of the time innovations and ideas come because of needs.  I have a new need:  clothes that I can wear with an expanding belly.  Yes, I am expecting.  It might not look like much of a belly now, but I remember those sad days of the third trimester when nothing seemed to fit anymore.  This time, I'm preparing ahead of time.


I might have mentioned the plethora of XL t-shirts we have?  Well, this one was destined to be my experiment in making myself a maternity shirt.  Because of the experimental approach, and my lack of energy to do much but get-er-done, I don't have any photos of the process.  Hopefully, this will be understandable anyway.

1.  I created a t-shirt pattern for myself by tracing half of my favorite-fitting t-shirt without the sleeves.  I've done that several times.  See it here or here.    Then I lay that half-pattern over this large t-shirt and traced it again on both sides.  I only traced to my bustline, and let it out as quickly as I could without making it come to points as I mistakenly did here.

2.  I took the cut-off sleeves and trimmed away the part that had connected to the shirt until the sleeves were as long as I wanted them and wide enough to fit in the now-smaller armhole.  I have left the sleeves wider, and made them ruffle at the shoulder before, and that is cute too.  Check it out here.

3.  Then I sewed the sleeves in and sewed up the open parts of the sides.  

The t-shirt now fits, but it is rather boring and balloon-like.  How can I make it cuter? 

Lets start with the sides.  I tried this before 
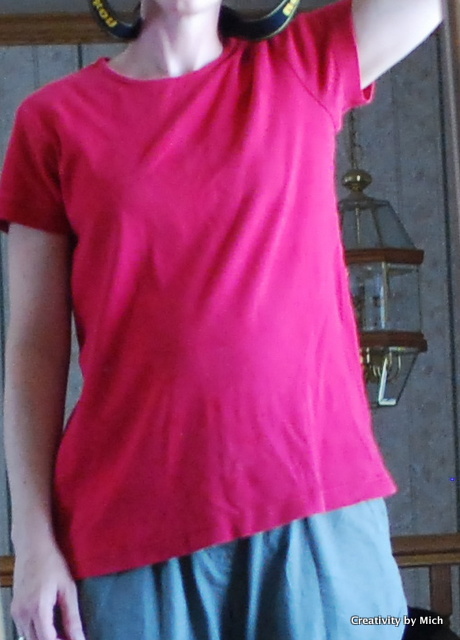
here, and rather liked it.  With my elastic thread in my bobbin, I sewed up both sides to my bustline.  Then I sewed up the crest of the sleeve as well.  This is what happened.


The top fits me well, and there's plenty of room around my waist.  Perfect.

Now for the neck.  I'm going to avoid any sewn-on embellishments at the moment because I'm worried about my grabby toddler, but some cute flowers or yo-yos could be fun at the neckline.

I wanted a smaller ribbing around the neck, so I trimmed it, like I did here.  It makes the neck less stretchy, but it looks less casual as well.

Then I took that elastically-threaded bobbin, and sewed a few inches down from the neck, making it into a V-neck.  


It doesn't look much like the shirt it was before.

I love how roomy it is. (I'm actually wearing it as I type this.)